Sunday 22 February 2015

My First Stamping Attempt

Last night I got bit by the stamping bug and got up and tried it today.

I purchased my first stamping plates from galcosmetics.com about four years ago. It's so long I can't even find them online (not sure if their name changed or they're no longer in business). I bought them, used them once and failed and never used them again. I love stamping designs and everyone seems so good at them but I'm forever hard on myself so after my first attempt was a failure I gave up.

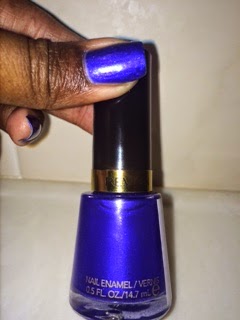
Fast forward to last night...not sure what got into me, but I wanted to stamp and I knew I wouldn't fail lol *toots own horn*. I started by testing out my gold and silver polishes over different colours on a blank sheet of paper and settled on an oxblood and gold colour scheme.

Products Used:
Orly Bonder Basecoat
Essie Sole Mate
Orly Luxe
Gal Cosmetics GA35 Stamping plate
HK Girl Top Coat
Konad Stamper
Konad Scraper
Clean Up Brush

Fair warning, It's going to be picture heavy.

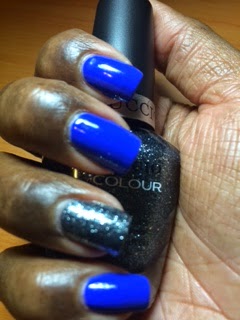
I started with a base of 2 coats of Essie Sole Mate followed by a coat of HK Girl top coat to speed up the drying time. Once that was dry I picked out my stamping plate and selected a design. Stamping is easy the tricky part for me is lining up and the design and getting it onto my nail in the position I want.

Gal Cosmetics GA35 stamping plate

the image I used


Quick breakdown of the steps:
Step 1: Paint ever stamping design with polish of choice
Step 2: Using the scraper, scrape away the excess polish
Step 3: Press/roll stamper over design
Step 4: Line up design and press/roll on nail


my Cinderella hand


I like how it came out, it's not perfect and I definitely need practice.

On another note, I am beyond frustrated with the quality of my pictures.I'm using the camera on my Iphone 5s because I can't afford a fancy schmancy camera right now. I know of other people who use their phone cameras and get good results so no idea what I'm doing wrong.

Any advice is welcome.

Until next time...

Sunday 15 February 2015

Blue Valentine

Yesterday was Valentines Day and I did not celebrate.  Don't know if I'm the Scrooge of Valentines or just jealous lolol.

What I did do was to paint my nails in something other than pink, red or white. I'm a rebel at heart! I was inspired by the movie Blue Valentine 'cuz that's the first thing i think of when I hear the word.

Products Used:
Orly Bonder
HK Girl Top Coat


This was a simple mani again and I wanted to jazz it up with some spikes (to poke somebody's eyes out) but I've got a show tomorrow and I don't wanna hurt somebody or myself. Maybe next time.


To everyone who celebrates V-Day I hope you had a good day and felt loved.

Until next time...

Thursday 12 February 2015

Simple and Sweet

I've been feeling pretty lost with what to do with my nails recently....ok I lie. I've been feeling pretty lost in general. So I went through my stash for something pretty and girly to put on my nails.

What I did was pretty basic but I still thought I would share.

Products Used:
Orly Bonder
HK Girl Topcoat


Milani can be purchased from all No. 1 Beauty Supply stores, Diamond Girl, Beauty Exchange and Imart. They usually go for around $10 a bottle.

Until next time...


Tuesday 10 February 2015

Review - Revlon Sultry

I found her!!

Hi again, I'm back with another review and this one was unexpected.

I found Revlon Sultry last Wednesday. This has been a lemming for a few months and I've been stalking every store that carries Revlon in the hopes it would magically appear.


Revlon Sultry

without flash

with flash

I was in need of a bit of retail therapy on Wednesday and decided to browse Cave Shepherd for something pretty to cheer me up. This baby did it for sure. Let me tell you about her.

I have no idea exactly when this was released or with which collection (not much info available from Revlon) but I hope it's in their permanent line. Sultry is the prettiest blue toned purple after OCC Technopagan. I'm almost sure it could be a dupe but I'll do a post on that a bit later. There's also pink and blue shimmer in there that makes it come alive. So now that you know how pretty it is let's get down to the nitty gritty.

The formula was a bit runny (but not difficult to work with) so it required a bit more attention so I didn't flood my cuticles. The first coat was a bit sheer and I felt as though I might've needed three coats to make it fully opaque but surprisingly two were enough. The brush is your standard Revlon Brush.

I purchased mine from Cave Shepherd for $14.99 local price (it's $11.25 duty free) and there were three left so if you like it, run and go get it because if you're a fan of these types of colours YOU NEED THIS IN YOUR LIFEEEE!!! I find shades like these look really good on darker skin tones.

without flash

without flash

with flash

with flash


This will definitely be a favourite of mine.

What other colours do you guys think look amazing on darker skinned girls? Let me know in the comments!

Until next time...

Sunday 8 February 2015

Mani-sooner or Later

I did this mani a few days back but never got around to posting it so I thought let me get it up today. Had no idea what to name so I did a play on one of the colours I used resulting in the cornyness you just read. Don't judge me lol!

Products Used:
Orly Bonder Base Coat
2mm red rhinestones
orange tear drop rhinestones
Tweezers
Clean Up Brush

So here's what I did.

I started by painting all my nails with two coats of Cherubic. On my middle and ring fingers I applied my straight nail vinyls in the design I wanted and went over with a fairly heavy coat of Monsooner or Later. Be sure to take off your vinyls as soon as you've painted your colour on top. If the polish starts to dry, the colour may pull and mess up the design as you try to take off the vinyls.

On my index finger I applied my rhinestones in what I thought was a random design (my sister thinks it looks like a flame). And that's it. Everything was sealed with my HK Girl as usual.


Hope you like it!

Until next time...

Tuesday 3 February 2015

Review: Glam Polish Unforgettable Dream

Hi again.

I'm back with a review of Glam Polish Unforgettable Dream.

This polish was a lemming of mine for a few months. It was released by Glam Polish and sold exclusively by Hypnotic Polish, an indie stockists who ships internationally. I didn't manage to snag it when it was initially released but it was released a second time and thank the heavens I got it then.

Unforgettable Dream is a pink/orchid color with the prettiest light blue shimmer. It also looks like there could be some glass flecks in there but it's truly original and I have no other polish like it. PURCHASE JUSTIFIED hahaha!!!


In sunlight it comes alive and can be quite distracting so drivers beware. I have this habit of getting distracted by pretty polish when I'm driving. You know what I mean, when you're on the highway and the sun hits your nails just so and you just can't help but stare. Anyway, I digress.


This baby took two coats. It covered really nicely with one but two were needed to pull it all together. The formula was nice and not too runny and it dries semi-matte so top coat is recommended. The brush is your standard nail polish brush.

Unforgettable Dream retails for USD$13.07 on Hypnotic Polish and it's limited edition so definitely grab it while you can as this is the last restock. I guarantee you won't be disappointed. This is my only colour from Glam Polish so far but I'll definitely be trying some more soon.

Does anyone else own this baby? Are there any dupes out there? Let me know in the comments!

Until next time...