Monday 30 March 2015

Picture Polish Review

Hi guys

Sorry this post didn't go up yesterday as planned.

This is gonna be a bit of a long post but I'll make sure it's not too wordy.

Today I've got a review of the Picture Polish colours I purchased recently.

Picture Polish is an Australian indie brand started by two girls,which they've expanded and it has become really popular in the last few years. 

Picture Polish Grace


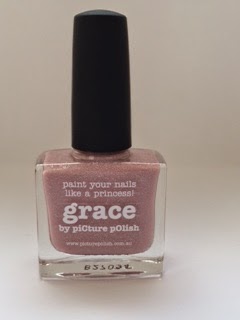
Grace is a light pink (looks like a muted dusty rose in certain lighting to me) with a scattered holo. Picture Polish says it was inspired by a beautiful princess, definitely a fitting description. This is one of PP's most popular shades. I was worried the colour wasn't going to suit me but it's really flattering. It shows up as a nice pinky nude on me. Pictured below is two coats but I think three would have been perfect to hide the VNL peeking through.


Picture Polish Instinct


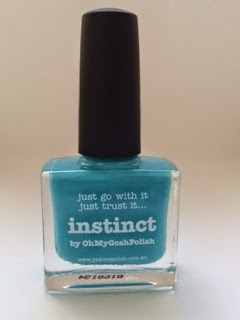
Instinct is a bright blue creme that GLOWS under blacklight. Doesn't that make you want it more?!?!?! This polish was inspired by Tam from OhMyGoshPolish. The formula on this was good as well but be careful with the amount of polish on the brush because I accidentally flooded my cuticles a few times. I used two coats here again. Good news is this blue doesn't stain.


under blacklight

under blacklight


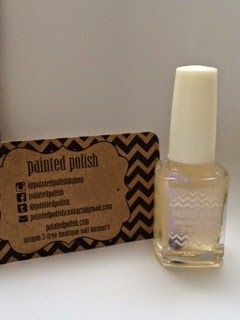
 Picture Polish Forget Me Not


This a a blue jean kinda blue with a scattered holo just like Grace and was inspired by Lacquertude. This shade of blue is definitely unique to my collection. The formula was great just like the others. I'm not able to say whether it stains or not just yet as I've only been wearing it a day.


Overall I'm really impressed with the quality of these polishes. I had no issues with the formula of any of them, pigmentation was great and they're self leveling which is always a plus in my books. The brushes are really nice, they spread out well on the nail but aren't so big that you lose control and get polish everywhere.

The polishes can be purchased from the Picture Polish site where they retail for $11AUD (BDS$17) or from any of the international stockists.

Hope you enjoyed this post. Until next time...


Wednesday 25 March 2015

How To: Building A Light Box

Hi,

This is my first DIY post. I've been wanting to make a light box for a while simply because the quality of my pictures bugged me.

So I got a box and got to work.

What you'll need:
Cardboard box (something your hand(s) can fit into comfortably
Box cutter
Scissors
White bristol board
White tissue paper/wax paper
Glue gun and glue sticks
Tape

I started but getting my box - I used a Silk almond milk box.

Step 1:
Determine which side of the box you want to be the front. It's easier to use the side with the four open flaps as the front simply because it's less work. Cut the flaps off the front of the box and if necessary reinforce the back of the box.

Step 2:
Now that you've determined the front and back of the box you need to cut out the sides to allow light to pass through. To do this you'll need to cut 'windows' into the sides and top of the box, leaving a one inch border around the edges. You can make a bigger border if necessary but it all depends on the size of the box. It's important that the box is sturdy and can stand on its own after the 'windows' have been cut out.

Step 3:
Cut your bristol board or hard card to the size of the inside of the box. This will be stuck to the back and bottom of the box. Once I cut mine to size I used my glue gun to stick it in. This purpose of this white card inside is to reflect light and it acts as a background. I've seen lightboxes where persons used white cloth, black or grey card and even holographic card so it's really just your personal preference.

Step 4:
Now that your 'windows' have been cut out it's time to cut your wax/tissue paper. I used wax paper because that's what I had on hand at the time. You can use the cutouts from the box as a template for the size of paper you'll need.

Step 5:
Once you've cut the paper to size you can begin to glue or tape it to the outside of the box so it covers the 'windows' you made. I used my glue gun here again and reinforced with masking tape.

TADAHHH!! Lightbox complete!!


Sorry I don't have any pictures, I didn't initially plan on making a tutorial out of this.

I hope this is easy to follow. If you try let me know how it goes for you.

In case my explanation isn't very clear here's a link for Nail'd It's Light Box Tutorial

Until next time...

Sunday 22 March 2015

Review: Cirque Colors NYFW

Hellerrrrr...how's everybody? 

Today I've got the review on Cirque NYFW for you guys.

Cirque NYFW

Little background. This colour was one of the first released as part of the Metropolis Collection which debuted last September. From the time it hit Instagram it was on my wish list and I've finally been able to get my hands on it.

NYFW is a bright cobalt blue cream polish. Cirque describes it as an ultramarine blue creme. This is another one of those must have blues in my opinion. The pigmentation on this colour is amazing and so is the formula. It's smooth, has a nice consistency and is self leveling. It took two coats to reach opacity. 


You can purchase NYFW and other colours from the Metrppolis Collection from www.cirquecolors.com or from any one of their stockists who ship internationally.

Until next time...

Sunday 15 March 2015

Haulin'


Hiii, it's been a while but I'm back.


Today I've got my new goodies to show you. In February I did some shopping from my bed and managed to get some things on my wishlist.


Just a heads up, this post is gonna be very picture heavy. I got a few polishes from Picture Polish, one from Painted Polish, Cirque and ILNP. I'm so excited I got them and once this no-buys over I'm going for round 2. On a real tho, Lent need tuh done, I struggling over here.

I'll review each of them over the next few posts.

First up is Cirque.


Cirque NYFW - the pretties blue you ever did see


Next up is Painted Polish.


The packaging and personalised note make you feel special

Painted Polish Flake Your Booty
The Painted Polish Trio.


I also got the Liquid Palisade to try and a new hand cream 'cuz I'm always on the hunt for a new one.

Liquid Palisade by +Kiesque, Inc. 


And I saved the best for last.

I got my paws on.....ILNP Supernova. *teeny wukkups all ova*.


And that's my haul for February.

Yesterday I also got time to make my light box. The quality of my pictures was really bugging me and I made sure to take them outside in daylight but they were terrible. Hopefully my light box makes a difference. Let me know what you think of them below.

I'm going to play in polish. Until next time...


Sunday 1 March 2015

Stamping Attempt #2

Hi Again!

This week I tried my hand at stamping again 'cuz I gotta get this good damnit.

This mani turned out slightly better than the first. Still need to work on getting the design lined up the way I want. My cinderella hand is wayyyy better though for some strange reason.

Anyway here's what you came to see.

Products Used:
Orly Bonder
HK Girl Top Coat
Gal Cosmetics GA38 Stamping Plate


I really really like this. Tell me what you think below.

Until next time...